Author Archives: Hilltop Nursery

Bay: An Herb Worth Enjoying

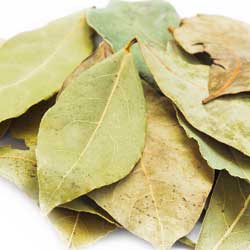
A staple in most kitchens, bay (Laurus nobilis) is a familiar herb popular for flavoring soups, stews, stuffing and marinades. But how much do you know about this savory seasoning?

History of Bay

Originally from Asia Minor including Turkey and Armenia, this fragrant plant is a broadleaf evergreen also known as sweet bay, bay tree or bay laurel. Because of its popularity and multiple uses, it quickly spread around the Mediterranean and beyond. Bay, along with true laurel, was worn in Greece and Rome as wreaths on the head for protection, as well as an honor for being victorious in sports and battle. Accomplished scholars, diplomats and statesmen could also be crowned with bay wreaths. 

Unique Uses for Bay

Bay leaves have long been used in flour and grain to keep pantry moths away. Medicinally, it has been used for treating high blood sugar, migraines and bacterial and fungal infections. The oil has been used in bruise and sprain liniments and salves. These evergreen plants can be attractive in the landscape, and have been used as topiaries, hedges and even houseplants.

The leaves of bay have the flavoring properties, and may be used fresh, though dried by is most familiar and common. Fresh leaves are less flavorful and milder, but after drying the flavor strengthens. Whole leaves are most commonly used to flavor recipes, but should be removed before serving because the sharp edges of the dried leaves can cause internal cuts if ingested.

Growing Bay

Bay is easy to grow in pots on the patio or indoors. Give the plant full sun for at least half the day, or keep it indoors in a sunny window. Pick the leaves as needed. Keep the plant pruned to size as it wants to become a tree. To dry bay for future use or to strengthen its flavor, leaves can be dried in a thin layer in the oven or sprigs may be hung upside down in a cool, dark, dry area such as a closet for several weeks until they are completely dry. Dried leaves can retain their flavor for a year or longer if properly stored.

Try a New Bay Recipe

Bay is popular to flavor stews, soups, roasts, stuffing, marinades and other savory dishes, and can even be used in teas. But what about a sweet dessert using this versatile leaf? Enjoy a new dish with bay and discover even more about its unique flavor and usefulness today!

Bay & Warm Bananas with Vanilla Ice Cream (from the Food Network)

  • 4 tablespoons butter
  • 2 bay leaves
  • 2 tablespoons freshly squeezed lemon juice
  • 1 cup fresh or frozen orange juice
  • 1 cup packed light brown sugar
  • 2 tablespoons bourbon
  • Pinch salt
  • 6 not quite ripe bananas, peeled and into bite sized pieces
  • 1/4 teaspoon freshly ground black pepper

In small skillet over medium heat, melt the butter and cook until browned, 3-4 minutes. Add the bay leaves and turn in the liquid, then add the lemon & orange juices, brown sugar, bourbon and salt. Simmer the liquid until it has reduced by half and has reached a syrupy consistency, about 5 minutes. Remove the pan from the heat. Add the bananas and black pepper. Stir to coat the bananas evenly. Serve still hot over ice cream.
bay-herb-1

Caring for Forced Bulbs

Potted tulips, crocus, hyacinths and daffodils add color to dull, dreary winter months. With proper care, these spring treasures can give you weeks of enjoyment long before their outdoor cousins poke through the soil, bringing a burst of color and life to your home even when winter is in full force. Stop by our greenhouse today and pick up some forced bulbs to brighten your home!

To Care for Forced Bulbs

While outdoor bulbs require are remarkably low-maintenance and will return year after year looking better than ever, forced bulbs take some extra care to keep looking their best while they’re in bloom. To make the most of your forced bulbs… 

  • Soil should be kept moist, but not wet. Do not allow the plants to stand in excess water, as this can cause rot that will destroy the plant. Be sure soil has proper drainage to keep excess water away from the roots.
  • Place the plants in indirect light and keep them as cool as possible. The cooler the temperature, the longer the bloom period will be. Ideal temperatures are 55-60 degrees during the day and 40-50 degrees at night. The pot may be kept in the refrigerator at night if necessary, or move it to an unheated garage or basement to chill out overnight. Placing pots near a window and away from heating vents can help keep them cooler.
  • When the flowers fade, cut off the flower stems near the soil level. Take care not to cut into the bulb, however, as the damage could impact any future blooming. Do not cut away foliage – it will continue to add nutrition to the bulb’s storage. Instead, allow the foliage to remain intact until it withers naturally, whether it is still in a pot or has been planted outdoors before wilting.
  • Bulbs cannot typically be forced indoors a second time. Instead, transplant the bulbs into the garden in the spring with a handful of bone meal in the hole and in a suitable location and soil type for the flower. Allow the foliage at least 6-8 weeks in the ground to gather energy for next spring.

Many forced bulbs will not rebloom immediately when planted outdoors, but with patience and good care, they may recover from being forced and could become an integral part of your spring landscape just as they were part of your indoor landscape in winter.

caring-forced

Helleborus – A Perennial for the Ages

When selecting new additions for the perennial garden it is almost impossible to find one that will provide year round interest. This difficulty is further compounded when you need a shade-loving perennial. Well, what was once considered impossible for a perennial is now possible with the Helleborus!

About Helleborus

Although there are many species of Helleborus, the most popular is the Lenten Rose (H. orientalis). Bred especially for its unusual range of color, this cultivar is a low maintenance, long blooming, shade loving, evergreen perennial.

  • Habit
    The neatly mounded form of the Lenten Rose grows approximately 12-24” high by 18-24” wide.
  • Flowers
    The nodding flowers of H. orientalis resemble a single rose and are about 2-2.5 inches across. They are available in range of colors that include white, cream, lemon, chartreuse, lime, pink, rose, maroon, plum and almost black. Many varieties can even be speckled. Flowers appear in early to mid-March, while most other perennials are still sleeping, and last well into May. This plant has the unique ability to bloom in freezing temperatures often with snow still on the ground.
  • Leaf
    The Lenten Rose boasts a large, glossy, leathery, evergreen, compound leaf. Each leaf is made up of 7-9 serrated leaflets borne at the end of the leaf stalk, producing an umbrella like effect.

Helleborus in the Landscape

This perennial works well near a walkway so that it can be easily enjoyed before the garden season even begins. Elevate the plant for a better view of the face of the nodding flowers. Use all Helleborus as specimens in a small garden or near a pond, in mass as an evergreen groundcover or to provide textural contrast in the mixed border. At home in a woodland garden, Hellebores work well with hostas, ferns, brunneras, snowdrops, pulmonarias and winter aconites. It can be attractive surrounding a tree, tucked next to a deck or in a rock garden.

Growing Helleborus

Hardy in zones 4-9, Helleborus orientalis grows best in heavy to light shade. It prefers moist, well-drained soil, rich in humus and organic material, and is pH adaptable for a wide soil range. Tolerant of summer heat and humidity, the Lenten Rose is adaptable to drier soils, and competes well with tree roots once it is established. Mulch well to retain moisture and fertilize in early spring before the flower stalks begin to lengthen. By the end of the winter, leaves can often become tattered or scorched. Simply cut off any unsightly leaves and fresh new leaves will soon replace them.

If you wish to divide H. orientalis, do so in the late summer to early fall. Make sure that you dig a generous root ball and provide plenty of water until established. The Hellebores do not like to be disturbed and are slow to recover when moved, so be gentle. Helleborus orientalis may be propagated from seed, however, seeds take six months to germinate and the young plants take three years to bloom so patience is essential – but well worthwhile for the stunning results.

Hellebores are not prone to any pest or disease, and these plants are deer resistant.  

Other Popular Hellebores

While the Lenten Rose may be the most popular of the Helleborus plants, it is not your only option. Other popular Hellebores include:

  • H. foetidus – Stinking Hellebore
    The flowers of this Hellebore are light green, and the evergreen leaves are more deeply lobed and sharply serrated than those of the Lenten Rose. The flowers of the Stinking Hellebore are said to be slightly malodorous.
  • H. niger – Christmas Rose
    Similar in appearance to the Lenten Rose, this Helleborus must be vegetatively propagated and blooms earlier in the season the Lenten Rose. It can be a great option for extending the blooming season in your shade garden.

No matter which Helleborus you would like to try, you’re sure to love the results when you add these shade-loving perennials to your landscape.

helleborus-1

Blooming Plants: Brighten Your Home & Office

It is no secret that houseplants can beautify your home and office as well as freshen the air, promote relaxation and improve concentration. But if you’re tired of plain foliage and miss the colorful bursts of your annual and perennial flowerbeds, why not opt for flowering plants indoors as well? There are many beautiful bloomers that can brighten up your home and office throughout the year.

Orchids

Orchids are favorite flowers that add an exotic touch to any décor. The most popular varieties for indoor blooming include…

  • Phalenopsis (Moth Orchid) – This favorite selection can continue to spike up to 9 months during the year and is considered the easiest to bloom
  • Dendrobium – Many fragrant varieties in lots of colors, can rebloom 1-4 times per year
  • Cattleya – Large standard variety blooms once per year, miniature varieties can bloom 2-3 times per year, many fragrant varieties, colors and sizes of flowers
  • Oncidium (Dancing Lady Orchid) – Blooms once per year and lasts 6-8 weeks
  • Paphiopedilum (Lady Slipper Orchid) – Blooms once per year with blooms lasting 6-8 weeks, very exotic.

Cyclamen

This popular plant produces a profusion of colorful flowers that bloom for a long time, ideal for adding reliable color and life indoors. Keep cyclamen evenly moist from September through May. Let them dry from June to August, so the tuber can rest and recover from the intense effort of the prolonged bloom cycle. Ideal light is a sunny east or west window. Cyclamen prefer a cool room (60-70 degrees). Feed them from September to May, then stop for the summer months.

African Violets

These small, robust plants are by far the most popular houseplant and among the easiest flowering houseplant that blooms all year long. Choose from a wide selection of pink, purple, magenta, white and blue options in both double and single blooms. African violets prefer bright, diffused or artificial light. Feed regularly and water from the bottom so as not to get water on the leaves, which could promote diseases and fungus. Be sure to empty any excess water so the roots do not rot.

Kalanchoe

These blooming plants’ flowers last for many weeks. Kalanchoes grow 8-12 inches tall with masses of small four-petaled leaves that are red, orange, coral, gold, yellow and purple. They have thick, waxy leaves with a succulent appearance and can withstand periods of dry soil, making them a good option for beginners or in offices that may be closed for holidays or other periods when the plants may be somewhat neglected. Water when soil feels dry to the touch and drain excess water from tray. Maintain flower color with bright, indirect sunlight daily for at least four hours.

Bonsai

If you haven’t tried it, the art of training a dwarf potted tree is a fascinating hobby. Because the soil around the bonsai plant is limited, these plants need watering almost every day, and sometimes twice a day during the hot summer. We carry a wide selection of starter plants and mature specimens from evergreen selections to tropical varieties. Some will bloom with true flowers, while others – though they don’t produce flowers – have such delicate and pleasing structures that their appearance is every bit as lovely as the most gorgeous bloom.

Not sure which blooming plant will be best for your home or office? Stop in and we’ll be happy to help you choose just the right plant to brighten your space!

blooming-ho-2

blooming-ho-3

blooming-ho

Japanese Pieris

Looking for an easy-care spring-blooming shrub that supplies year-round beauty? Take a look at Japanese Pieris this season – you won’t be disappointed!

About Japanese Pieris

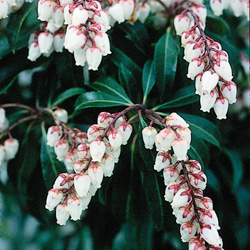
Pieris japonica is an upright evergreen shrub with spreading branches. It has the potential to grow 6-8 feet high and 4-6 feet wide. This is an easy to care for four-season plant that can be a stunner in the yard throughout the year. Except when they emerge in early spring with a bronzy hue, the leaves of the Pieris are lance-shaped and glossy deep-green throughout the year. The flowers appear in April and last well into May. The urn-shaped blooms, like those of lily-of-the-valley, hang in heavy, drooping, pendulous clusters that are 3-6 inches long. The fruit is ornamental and will persist through the winter, but it is best to remove the fruit so that the plant will put its energy into developing next year’s flowers.

Growing Tips

Not as fussy as other ericaceous plants like heath and heather, Pieris prefers a moist, well-drained, acidic soil with a pH in the range of 5.0-6.0. When planting, amend soil with plenty of peat moss; this will aid in drainage and help make the soil more acidic. Organic matter like compost should be added to compacted soil to increase drainage and should also be added to sandy soil to enhance water retaining capability. Sulfur may be added to the soil to lower the pH if it is too high. After planting, mulch the soil around the base of the plant with two inches of bark mulch, making sure to keep it from touching the trunk of the shrub. Pine bark mulch is a good choice when mulching Pieris because it will acidify the soil as it decomposes.

Pieris likes a semi-shady location and will flower best in areas where it receives some sun during the day. Protect all broadleaf evergreens from the prevailing winter winds. If this is not possible, spray them in the winter with Wilt-Pruf, an anti-desiccant, to prevent winter burn. Pieris must be watered frequently during the first year after planting to encourage root growth. The addition of a root stimulator at planting time will encourage the plant to quickly create deep, strong roots. After becoming established, Pieris is relatively drought tolerant but does, of course, grow best with consistent adequate moisture and regular fertilization.

Pruning Pieris is usually not required. When purchasing, know the ultimate size of the cultivar you desire so that you may choose a suitable location in your landscape where the plant may grow to its full potential. If pruning is necessary, prune immediately after flowering so as not to interfere with the formation of next season’s buds.

Pieris in the Landscape

Pieris mixes well with shade-loving plants that require acidic soils such as azaleas and rhododendrons. Highly diversified in its design use, Pieris works well in a Japanese garden, woodland setting, shrub border, foundation or even a mass planting. The smaller varieties look great in containers and rock gardens. Pieris is deer-resistant as well, making it a great border or screen for other plants.

Cultivars

We have a great collection of Pieris cultivars to satisfy the novice as well as the discriminating connoisseur. Consider the following varieties, or come in to see the latest Pieris types and let us help you choose the best one for your landscape.

  • ‘Brookside’ – New growth is chartreuse. It has upright white flowers and a dwarf habit, maturing at only 1-2 feet tall.
  • ‘Brower’s Beauty’ – Compact form, 4 feet wide by 6 feet high. This is a heavy bloomer with large trusses of white flowers in spring.
  • ‘Cavatine’ – This is a low growing, compact mounding cultivar with white flowers that are held upright on the plant. This cultivar blooms slightly later than others.
  • ‘Dorothy Wycoff’ – Compact form, 4 feet wide by 6 feet high. Dorothy has dark red buds opening to pale pink flowers.
  • ‘Flaming Silver’ – Leaves emerge a brilliant red, turning green with a pink margin and finally becoming green with a silver-white edge. This cultivar matures at 6 feet wide by 6 feet high.
  • ‘Forest Flame’ – Light pink leaves mixed among brilliant red appear after the plant has finished blooming in spring. Flowers are white. This Pieris grows 8-10 feet tall.
  • ‘Mountain Fire’ – With its vivid fiery-red new growth, clean white flowers and a compact uniform growth habit, this Pieris has become increasingly popular in the last few years. ‘Mountain Fire’ matures at 4 feet high by 4 feet wide.
  • ‘Prelude’ – This cultivar would make a wonderful addition to any rock garden. It is a dense mounding, low growing plant with red new growth that blooms slightly later than most other Pieris.
  • ‘Valley Fire’ – The young growth on this vigorous grower is a brilliant red. This cultivar has white flowers that are larger than most other Pieris.
  • ‘Valley Valentine’ – This Pieris has deep maroon flower buds on pendulous flower stems that open into deep rose-pink, long-lasting flower chains. It is a slow-growing cultivar with a compact mounding habit maturing at about 5 feet tall by 6 feet wide.
  • ‘Variegata’ – Attractive leaves are green with white margins. Flowers gracefully droop in white clusters. This Pieris grows to 5 feet tall in the garden or landscape.

PIERIS-3PIERIS-4

PIERIS-5

Dormant Pruning With the Proper Tools

Late winter pruning is often recommended for many trees and shrubs. Pruning the plants while they are dormant is less stressful for the plant and it’s also easier to view the structure of deciduous trees and shrubs without leaves to ensure the pruning helps create the desired shape. It’s also a time of the year when late winter sunshine makes us all long to be in our gardens and pruning is an excellent job to get us out there.

Pruning Tools

To get out and get pruning, you will need the proper tools. There are several types of pruners that should be in every serious gardener’s tool shed.

  • Hand Pruners
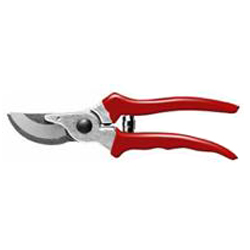
    The simplest tool, but the hardest to choose, is the hand pruner. There are two distinct styles of hand pruners: the anvil type and the bypass. The anvil pruner is good for pruning deadwood or undesirable growth. For more valuable specimens anvil pruners tend to smash the wood during cutting, leaving the wound open to insects and disease. Bypass pruners are like a pair of scissors and give you an easier, cleaner healthier cut. Different hand pruners are available in different sizes and grip styles, including options for both right-handed and left-handed gardeners. To get the best results, it is important to choose a hand pruner that feels comfortable but still provides adequate strength for the job.
  • Lopping Shears
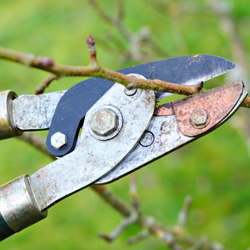
    Another tool that comes in handy is the lopping shear. They are used for making larger cuts up to 1-1/2″ in diameter, and have longer handles to provide more power without stress or strain. The longer handles also provide a better reach than hand pruners. They are also excellent for clearing away undesirable growth in your yard, including trimming hedges.
  • Pole Pruners
    The last tool you’ll need is a pole pruner. It is a combination lopping shear and pruning saw. The pole pruner extends out to twelve feet and can be used for making small cosmetic cuts or larger limb removals without needing to set up a ladder. Pole pruners are also useful in dense canopies when using a ladder would not be practical or suitable.

To learn more about pruning specific trees or shrubs and to choose the appropriate tools for the job, please stop in or give us a call. We’ll be happy to help you be sure you are equipped to make clean, appropriate cuts that will help your trees and shrubs look their very best.

dormant-2
dormant-1

Create a Beautiful Tree in 6 Easy Steps

Have you ever wondered how to create that beautiful Christmas tree, the kind featured in photo shoots and magazines? Whether you opt for a live potted tree, a fresh cut pine or an artificial tree you can reuse for several years, the steps to a stunning, artistic tree are the same, and you don’t have to be an interior designer to create a lovely Christmas tree. 

  1. Color
    Pick a theme color or color pair. This may be colors you simply like together, or you could mimic school colors, a favorite sports team or classic holiday pairings like burgundy and gold or blue and silver. Consider your tree theme and choose colors accordingly, such as blue and aqua for a tropical, undersea tree, or white and silver for a winter wonderland tree.
  2. Lights
    Use one strand of 70 to 100 lights for each foot of tree (7 strands for a 7-foot tree). This will be the approximate ratio on a pre-lit artificial tree, or you will need to add lights to a live tree. Spread the strands out evenly, and tuck wires into the tree so they are less visible. White lights or a single color are generally more elegant than multi-colored strands.
  3. Ribbon
    Plan on 40 to 60 yards of ribbon unless the tree is in a corner. The treetop will typically take 10-15 yards of this amount. You can also mix two ribbons for a nice effect, too. Wire-edged ribbon is easier to shape into graceful curves, and a broad ribbon will make a more dramatic impact, particularly on a larger tree. Drape the trailing edges of ribbon down the sides of the tree, either straight toward the ground or in a graceful spiral.
  4. Accents
    Add silk or dried flowers as your next step along with garland. Make sure flowers are placed at different depths within the tree so there is dimension. Holiday flowers such as poinsettias are most popular, but you can opt for different blooms to coordinate with your theme, such as roses for a Victorian tree or tropical flowers for a festive beach-themed tree.
  5. Balls
    Use 6-8 boxes of plain glass ball ornaments, either all the same color or 3-4 boxes each of two coordinating colors. Tuck some of these ornaments deeper within the tree to reflect more light and add depth to your decorating. A medium-size ornament is appropriate, or choose balls of different sizes but in the same plain color and basic shape.
  6. Ornaments
    Add themed ornaments last for that finishing touch and to give your tree some whimsy and pizzazz, but try not to go overboard with quirkiness. If you prefer a simpler, more elegant look, avoid overly themed ornaments but choose simple colored ornaments in different shapes that match your overall color plan, such as using drip, icicle, or star-shaped ornaments to complete the tree.

Voila! You have a Christmas tree that will bring beauty and elegance to your holiday decorating all season long.

create-beautiful-tree

Time-Saving Tips for the Holidays

With shopping, decorating, baking, cooking, travel, entertaining and more all part of the holidays, it’s a wonder there is any time left over to just enjoy the season. These time-saving tips can help you make the most of every minute without sacrificing the joy and celebration that matters most at this time of year.

  • Start early! You may not enjoy seeing “Christmas Creep” in stores before Halloween, but if you start addressing holiday cards ahead of time, make freezer recipes for holiday meals or try shopping for holiday gifts with Columbus Day, Veteran’s Day and other fall sales, you’ll have far less to do the closer the holidays get.
  • Tabletop topiaries are great for holiday decorating, and need nothing more than a festive bow for instant seasonal appeal. They also make a green and growing addition to your home when you need it most in the late winter months. Pick one up from the nursery for an instant gift – no wrapping needed!
  • Cast stone cherubs and garden sculptures make wonderful holiday decorations set off by greens and berries. When the holidays are over, you don’t need to lug them into storage. You can even change their decorations seasonally to reuse them as fun and whimsical accents throughout the year.
  • Present gifts in reusable gift bags, stockings, baskets, tins and garden totes for easy wrapping job that’s recyclable. For even more flair, use a colorful scarf as an impromptu ribbon, or trim the package with seed packets or small garden tools instead of disposable bows.
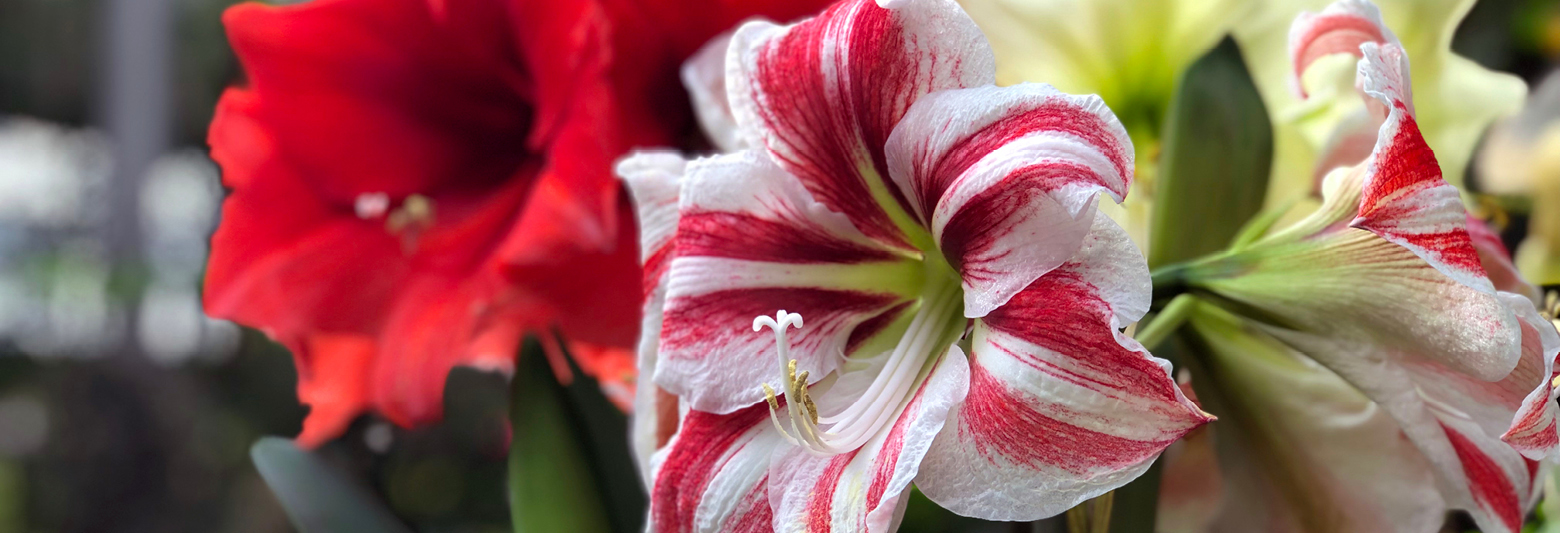
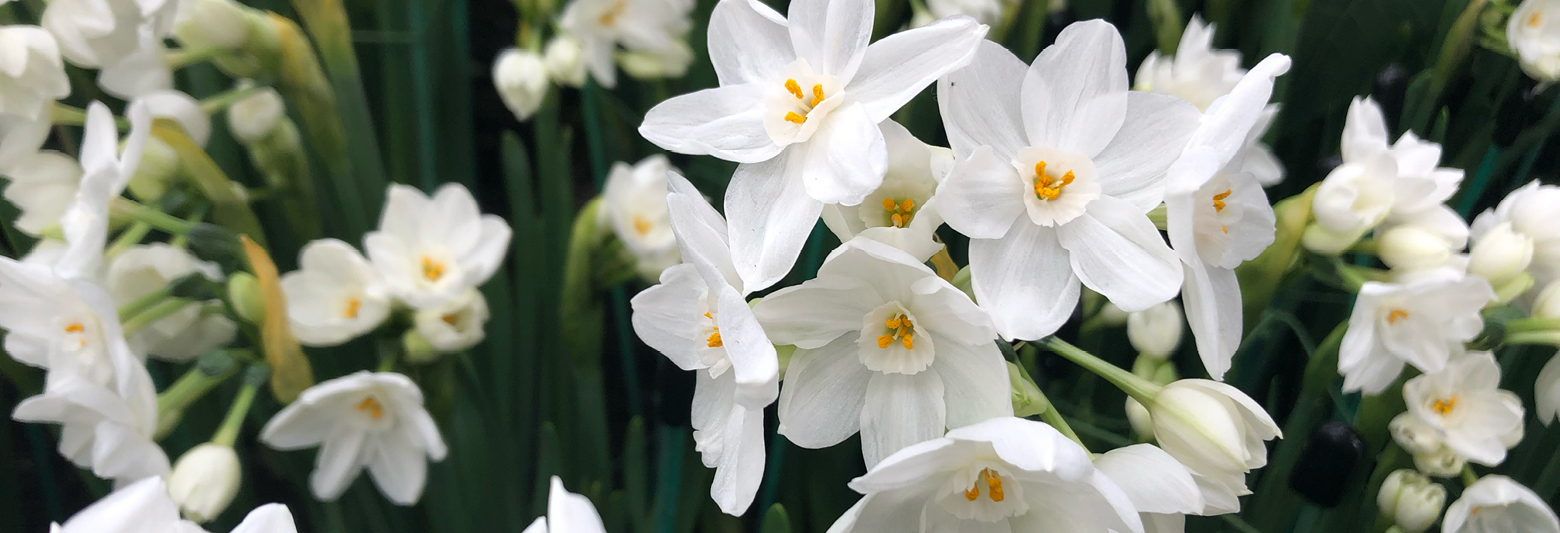
  • Start Amaryllis and Paperwhite bulbs now. Use potting soil rather than gravel for longer lasting blooms. Also consider other living holiday gifts, such as fragrant herbs, luxurious poinsettias or even a shaped rosemary plant or miniature Norfolk Island Pine decorated for the season.
  • Float a candle or a sprig of greens in a crystal bowl for an instant elegant center piece. Add more color with marbles or pebbles in the bowl, or choose a bowl with etching or seasonal patterns for subtle flair.
  • Start your holiday baking early and freeze doughs or completed recipes to save time later. Baked goods – cookies, breads and fudges – also make delicious and easy gifts, with no extra time needed for another batch if you’ve doubled the recipe.
  • Keep a few extra wrapped gifts in a handy closet, labeling the contents with Post-It notes so you can quickly choose a gift for an unexpected guest. Easy items to give include warm gloves or socks, fragrant candles, seasonal photo frames, mini tabletop games, tote bags and luxury soaps.
  • Don’t be afraid to delegate! Consider a pot luck holiday dinner, enlist your kids to keep the tree stand full of water, share shopping tasks with a sibling, join a cookie exchange for less stress holiday baking or shop online to have gifts wrapped and delivered right to the recipients.
time-saving-1

time-saving-2

time-saving-3

time-saving-4

Cut Christmas Tree Selection and Care

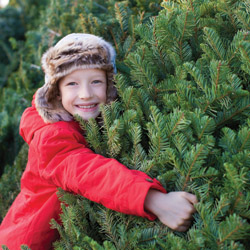
A fresh cut tree can be a wonderful addition to your holiday décor as well as a treasured Christmas tradition. Unfortunately, with poor care a cut tree can be looking wilted and worn long before December 25, but if you know a few tricks, you can keep your tree looking vibrant and lush throughout the season. Extend the life of your cut tree this Christmas and enjoy the beauty of the season much longer! 

  • In selecting a tree, make sure the “handle” at the bottom is long enough to allow the trunk to fit into your tree stand. Otherwise, it will be necessary to remove large branches near the base, which could ruin its appearance, shape and visual balance.
  • Check the tree’s freshness before your purchase by bending, pinching or flexing needles. They should be somewhat pliable and not fall off easily. Avoid purchasing a tree that is already showing signs of dryness.
  • Make a fresh cut to remove 1/4″ to 1″ of wood from the base of the trunk before putting the tree in the stand. If you use a “center pin” stand, make sure the hole is drilled in the stem after the tree is trimmed.
  • Once home, place the tree in water as soon as possible within 6-8 hours after cutting the trunk. This will help the tree better absorb moisture to keep the needles plump and secure.
  • If needed, trees can be temporarily stored for several days in a cool location, such as a garage, before being taken indoors and decorated. Place the freshly cut trunk in a bucket full of water. The tree may need to be supported to keep it from tipping over.
  • To display the trees indoors, use a stand with an adequate water holding capacity for the tree. As a general rule, stands should provide 1 quart of water per inch of stem diameter.
  • Use a stand that fits your tree. Some stands have circular rings at the top, so the ring must be large enough for the trunk to fit through the hole. Other stands are open, which may allow a greater range in trunk size. Avoid whittling the sides of the trunk down to fit a stand. The outer layers of wood are the most efficient in taking up water and should not be removed.
  • Keep your tree away from sources of heat such as fireplaces, heaters, heating vents and direct sunlight, all of which can make it dry out more quickly. Lowering the room temperature will slow the drying process, resulting in less water consumption each day.
  • Check the stand daily to make sure that the level of water does not go below the base of the tree. With many stands, there can still be water in the stand even though the base of the tree is no longer submerged an unable to absorb water.
  • Apply Wilt-Pruf, an anti-transpirant, to branches to help prevent moisture loss and needle drop. This should be done as quickly as possible before decorating the tree.
  • Do not use additives in the water, including floral preservatives, commercial tree preservatives, molasses, sugar, bleach, soft drinks, aspirin, honey, etc. Clean water is all that is needed to maintain the tree’s freshness.
  • Miniature lights, particularly LEDs and other energy-efficient bulbs, will produce much less heat and reduce drying of the tree. Do not overload the tree with too many lights.
  • Always inspect light sets prior to placing them on the tree. If worn, replace with a new set. And, do not overload electrical circuits, fuses or circuit breakers.
  • Always turn off the lights when leaving the house or when going to bed. Minimize how long the lights are on, such as not leaving the lights on during the day when they are less visible.
  • Monitor the tree for freshness by bending or pinching needles to test their flexibility. After Christmas or if the tree is dry and brittle, remove it from the house.

With just a few common sense steps, you can find a lovely fresh cut tree and keep it beautiful throughout the holiday season.

Tools for Holiday Gift Giving

It’s easy to shop for gifts for the gardeners on our holiday list. There are always new tools available for the serious, and not so serious, gardeners in our lives. In fact, there may be too many to pick from, but we can help you narrow down the selection to find the perfect gift.

  • Pruners
    Every gardener faces the need to prune or deadhead flowers at some time. From hand pruning a wayward twig to removing a branch 10′ overhead, there is a pruning tool to make any job easier.Because everyone’s hands and hand strengths are different (and some folks are left-handed), hand pruners are the most personal of garden tools. Two well-known companies, Corona and Felco, produce hand pruners and saws. Hand pruners come in two basic styles: by-pass pruners have two sharp blades that pass each other when cutting, while anvil pruners have one sharp blade cutting the material against the other flat blade. Both companies offer several models of these styles to accommodate different pruning needs, sizes of hands, hand strengths and orientations. New ergonomic models optimize hand strength and minimize discomfort.Another option is a pruning saw, which is different from any old saw. A larger sheath model saw makes short work of removing a large branch. A smaller fold-up model is great to have in a gardener’s pocket while making the daily rounds. Different models, with different lengths and teeth sizes, ease sawing effort. Check out our gift shop to see all the options.

    When an overhead branch requires removal, a gardener appreciates a pole pruner. Not only is it a hassle to get out the ladder, it’s dangerous to perform the sawing and pruning motions when balancing. The redesigned Fiskars pole pruners are powerful, with a telescoping pole to 12′ extension. If the branch is too large for the pruner, the detachable saw blade cuts through it. Unlike the old style pole pruners, there are no ropes to pull (and tangle in the tree!). Pruning heads even swivel to get a closer and cleaner cut. The Fiskars pole pruner, or Pruning Stik®, won’t fit in your gardener’s stocking, but it’s certain to be a winner!

  • Shovels and Spades
    Shovels and spades are other key gardening tools. While many shovel versions exist, the round point shovel is the most common. The heavy-duty blade point pushes through the soil and the rounded blade scoops the soil. Square-edged shovels also scoop soil and other materials in addition to digging but don’t have the point. Spades, basically a smaller version of a shovel, are usually flatter. Most shovels have a rolled lip, or rim, on the top of the blade. This is where the user puts their foot to push the tool into the soil. The larger the rim, the more comfortable for the foot when doing a lot of digging.Better quality shovels and spades are powder coated to prevent rust, are pre-sharpened, and the blade is welded or forged to the shaft. Shafts vary in style and material. Wood, plastic or fiberglass shafts may be straight or end with a handle. A fiberglass shaft lasts longer than wooden shafts and doesn’t require annual maintenance and cleaning. Ergonomic designs reduce the chance of wrist injury. Other shovel/spade specialties include the trenching shovels to dig deeper than the standard 12 inches, border spades and smaller sized round point shovels to dig smaller holes or working around existing landscape. And don’t forget trowels and other hand digging tools. If your gardener has a special digging or scooping need, there’s a shovel or spade for it.
  • Hoes
    Hoes may seem old-fashioned, but there are new designs every gardener can appreciate. Used since ancient times, the hoe performs many functions in the garden depending upon its configuration. The regular hoe’s rectangular shaped blade, positioned at a right angle to the shaft, weeds and shallowly cultivates. The V-shaped version, also called the Warren hoe, has a point to dig furrows for seed planting. The other side closes the furrows after planting. The “weeding” and “action” style hoes make short work of removing weeds.
  • Rakes
    A rake is another essential tool. Think of a leaf rake as a large hand – it allows the user to gather a large amount of material such as leaves and debris. Rakes may be metal or plastic, quite large to cover a large area quickly or quite small to get under plants without damage. Rakes are practical and save time and energy. Specialized rakes include the two styles of garden rakes, flat and bow, and thatch rakes to remove thatch from lawns to keep turf lush and thick.

There’s just one problem with giving these larger tools as gifts – they’re very difficult to wrap!