Author Archives: Hilltop Nursery

Butterfly Bush

What could be more enjoyable than relaxing in your favorite lawn chair or hammock, your sunglasses on and a cool beverage in hand, staring at an enchanting array of colorful butterflies milling around their favorite plant? What could possibly be an easier way to accomplish this vision than by planting a simple butterfly bush?

About Butterfly Bush

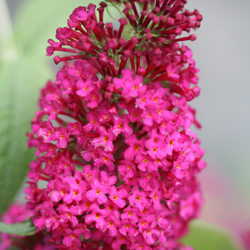
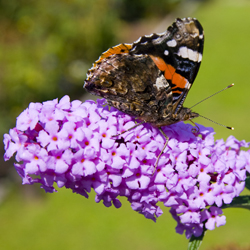
Buddleia davidii, the butterfly bush, is a flowering maniac. It pushes its proliferation of perfumed blooms straight through summer and well into fall, providing nourishment to butterflies all season long. Available in a multitude of colors ranging from white to pink to red to purple, there are colorful butterfly bushes to match any garden or landscape color scheme. The fragrant, long, spiked panicles are borne in profusion on long, gracefully arching branches that add drama and elegance to the yard. And it really is a butterfly magnet!

Growing Butterfly Bush

This quick growing, deciduous, woody shrub is winter hardy in zones 5-10. In the northernmost areas of its hardiness range, Buddleia behaves like a herbaceous perennial, dying back to the ground in very cold winters. In the southernmost areas, Buddleia is grown as large shrub and can flourish all year. In either location, however, you should treat this plant as a cut back shrub. Because butterfly bush blooms on new wood, it benefits the plant to be cut back to the ground each spring. This judicious pruning will stimulate lavish new growth and an abundance of flowers. It will also keep some of the larger varieties at a manageable size, particularly in smaller yards, corners or other confined spaces.

Plant your butterfly bush in full sun in just about any type of soil and it will thrive. Don’t worry about fertilizing as over-fertilization can encourage too much leaf growth over flower formation. Deadheading will encourage additional growth and new flower buds to extend the blooming season. Buddleia has a good tolerance for drought once established, but should be carefully watered when young. A good, thick layer of mulch will help maintain soil moisture and keep weeds down to keep the shrub healthy. Just be sure not to use insecticides or pesticides on your butterfly bush or you may be harming the very fluttering fliers you hope to attract.

Not sure which butterfly bush to try? Consider these varieties to choose the perfect color and style to suit your yard.

Recommended Buddleia Varieties by Color

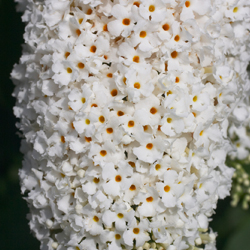
White Butterfly Bushes

  • ‘Nanho Alba’: 6-8’ height, blue-green leaves, mildly fragrant
  • ‘Silver Frost’: 5-6’ height, silver-gray leaves
  • ‘White Ball’: 3-4’ height, silver foliage, compact habit
  • ‘White Bouquet’: 8-10’ height, gray-green leaves, flowers have orange throat
  • ‘White Cloud’: 8-10’ height, gray-green leaves, flowers have yellow eye
  • ‘White Harlequin’: 8-10’ height, variegated leaves

Pink Butterfly Bushes

  • ‘Charming’: 6-10’ height, blue-green leaves, flowers have orange throat
  • ‘Fascination’: 8-12’ height, lilac-pink flowers with cupped petals
  • ‘Pink Delight’: 4-7’ height, gray-green leaves, true pink flowers, fragrant
  • ‘Summer Beauty’: 5-6’ height, silvery leaves, pink-rose flowers
  • ‘Summer Roae’: 8-10’ height, mauve-rose flowers, strong fragrance

Red Butterfly Bushes

  • ‘Burgundy’: 8-10’ height, magenta-red flowers, fragrant
  • ‘Dartmoor’: 8-10’ height, magenta flowers
  • ‘Harlequin’: 6-8’ height, variegated leaves, reddish-purple flowers
  • ‘Royal Red’: 10-12’ height, purple-red flowers, fragrant

Purple / Blue Butterfly Bushes

  • ‘Black Knight’: 8-10’ height, deep violet-dark purple flowers
  • ‘Bonnie’: 8-10’ height, light lavender flowers with orange eye, sweet fragrance
  • ‘Ellen’s Blue’: 5-6’ height, silver leaves, deep blue flowers, orange eye, fragrant
  • ‘Moon Shadow’: 3-4’ height, lilac purple buds open to lavender flowers
  • ‘Nanho Blue’: 6-8’ height, gray-green leaves, mauve-blue flowers, fragrant
  • ‘Orchid Beauty’: 6-8’ height, lavender-blue flowers, fragrant
  • ‘Potter’s Purple’: 6-10’ height, deep purple flowers, mild fragrance
What a Knock Out!

Think you don’t have the time to take on all the upkeep, maintenance and care beautiful roses require? We have a fabulous solution and it’s a knock out, a Knock Out® rose that is. This shrub rose is the single greatest sensation to hit the plant market in years! Knock Out® roses are valued for their continued and profuse blooming with very little care. Not only are Knock Out® roses gorgeous and easy to care for but they are also drought tolerant, self-cleaning, and disease and pest resistant. Knock Out® roses are like no other rose on the market.

Site Selection

Planting your Knock Out® in the right location will help it flourish its very best.

  • Knock Out® roses grow to about 5’ tall x 5’ wide. Give them enough space to grow to full maturity without overcrowding that can dampen their brilliance.
  • Choose a planting location in full sun and with good air circulation to ensure the brightest blooms and best health.
  • Planting soil should be amended with compost and drain well. Prepping the soil before planting will ensure proper nutrition for your rose.
  • Soil pH should be slightly acidic, 6.0-6.5, but this plant will also thrive in slightly alkaline soils, with a pH as high as 7.5.

Planting

Give your Knock Out® the best advantages as it gets established by planting it properly.

  • Dig a hole twice as wide as the pot but no deeper than the containerized root ball.
  • Remove your Knock Out® rose from the container, massaging the container slightly to loosen the root ball and exerting gentle pressure on the stems, not the foliage.
  • Gently tease the root from the root ball to loosen roots so they will settle in to new soil more comfortably.
  • Place the plant in the hole, making sure that it is planted no deeper that it was in the container.
  • Backfill with amended soil and lightly press down around the plant to remove any large air spaces.
  • Mulch around your Knock Out® to keep weeds down and conserve soil moisture.
  • Water regularly until the plant is established.

Care

Knock Out® roses require much less extensive care than many other rose varieties, but some TLC will help keep your roses healthy and vibrant.

  • Once a year, apply about 2 inches of compost around the base of your Knock Out® rose. This helps replenish the soil’s nutrition for good growth and bright blooms.
  • Mulch yearly with 2-3 inches of mulch to conserve soil moisture and prevent weeds.
  • Fertilize your Knock Out® rose three times a year: early spring, early summer and fall. Fertilize with a slow-release product recommended for roses, and follow application instructions carefully.
  • At the same time that you fertilize, also broadcast one cup of Epsom salts, a source of magnesium, on the soil around the base of the plant.

Pruning

All roses require some minor pruning to help shape the bushes and encourage better blooming. To keep your Knock Out® as a true eye-catcher…

  • Correctively prune Knock Out® roses any time of the year with hand pruners. Make your cuts about 1/4 of an inch above a leaf. Use sharp, clean tools to avoid transmitting pests or diseases from other plants.
  • In early spring, each year, heavy pruning is recommended. Cut back the main stems to 1/3 of their height. Make your cuts 1/4 of an inch above an outward-facing bud for the best growth and shape.

Knock Out® Choices

Which Knock Out® is right for your yard? Any of these varieties is sure to be a hit!

  • Knock Out®: The original. Cherry red, single flowers.
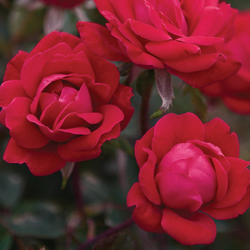
  • Double Knock Out®: Twice as much fun with cherry red, double flowers.
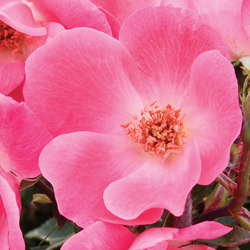
  • Pink Knock Out®: Bright pink, single flowers.
  • Pink Double Knock Out®: Double duty with bright pink, double flowers
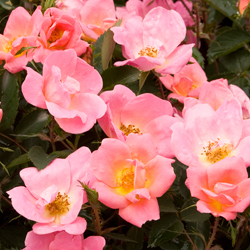
  • Rainbow Knock Out®: Single flowers in coral-pink with yellow centers.
  • Blushing Knock Out®: Gentle beauty with pale pink, single flowers.
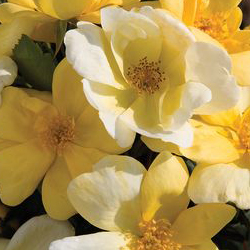
  • Sunny Knock Out®: A splash of brightness with fragrant yellow, single flowers.

The N-P-K of Fertilizer

Once upon a time, Mary, Mary, Quite Contrary grew her garden with silver bells and cockleshells, but nowadays, most gardeners use some other forms of fertilizer that are better formulated than nursery rhymes. But what important components make up a fertilizer, and why are those components important for your plants?

Understanding Fertilizer

Simply put, a fertilizer has nutrients to make a plant grow better. Years ago, farmers used composted manure, ashes and urine. Today, most of us buy our fertilizer, but a trip to the store can be confusing. What do those numbers on the fertilizer bag mean? Should I buy liquid or granular? Which is better, slow or quick release? Let’s investigate…

Without getting too technical, the three numbers show the percentage of available nitrogen (N), phosphate (P) and potassium (K) in a fertilizer blend. By law, it always goes in that order. If you see a fertilizer with 20-5-10, it means the fertilizer contains 20 percent available nitrogen, 5 percent phosphate and 10 percent potassium. Other nutrients and filler make up the difference and are often chosen for specific types of plants, such as roses or flowers, vegetables, trees, etc.

What does that mean to your plants?

  • Nitrogen promotes chlorophyll, producing greener, more quickly growing plants. If your plants aren’t as green as they should be, use a fertilizer with nitrogen. Most lawn fertilizers have a relatively high nitrogen content and cause mowing to be more frequent as lawns “green up” and grass blades grow more quickly.
  • Phosphate improves root growth, flowering ability and bloom size. Use a fertilizer with a larger middle number (phosphate percentage) to encourage root growth during transplanting or to encourage blooms. This is especially important when initially planting so root systems become strongly established.
  • Potassium enables the photosynthesis process and improves plant resistance to cold spells, drought and insect attacks. Many people use a potassium fertilizer when the seasons change to help plants resist the stresses of those transitions.

Liquid or Granular? Fast or Slow?

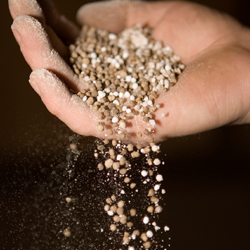
Fertilizers come in liquid and granular forms. Generally speaking, liquids are highly concentrated and need to be mixed with water before being fed to plants, but they are absorbed more quickly and are easy to apply more evenly. Granular formulas have small beads or grains that must be spread around and watered into the soil, and it can be difficult to spread an even layer over large areas unless a spreader is used. Granular forms need time to dissolve or decompose before they can be absorbed, but they last longer in the soil and can nourish plants for weeks or months.

Similarly, fertilizers come in fast or quick release forms as well as slow release forms. Both can work well in any garden, depending on your fertilizing needs, plant nutritional requirements and condition of your soil.

Read the label carefully for specific instructions and uses. It may seem boring, but reading that label will prevent bad results, as overuse or misuse of fertilizer can kill your plants, upset the balance of your soil and even cause environmental contamination – not the results you planned. Once you know more about fertilizer and how to use it correctly, however, you’ll enjoy the results this extra treat can give to your garden.

Azaleas – An American Favorite

Azaleas are true garden favorite and are popular in all types of landscape designs. To keep them blooming prolifically and as beautiful as they can be, however, you will need to follow a few special directions for their best care.

Planting Azaleas

Azaleas need a well-drained location, as they will not thrive in an area that stays overly wet. They prefer afternoon shade, and too much sun can harm their leaves and fade the flowers, depleting their beauty. For their best growth, it is important to shelter azaleas from drying winds. The best locations in the landscape will be along the north, northeast or east side of a building or stand of evergreens or in the filtered shade under tall trees.

Azaleas may be planted any time of the year, even when in full bloom. Spring and early fall are ideal planting times so the plants are not stressed by the heaviest summer heat. Before planting, loosen the matted roots with a hand cultivator so they can spread and establish more easily.

To give azaleas the excellent drainage they require, they should be planted high, with half the root ball above the existing ground level in a hole at least twice as wide as the root ball. Amend the planting soil to provide good nutrition for these hungry plants. Once the plant is set in the planting hole, fill in around it with the planting mix, packing firmly to eliminate air pockets. Mound soil up to top of root ball. Water shrubs thoroughly with a diluted plant starter fertilizer to encourage root growth and help them establish more quickly. Mulch 2-3 inches deep over the planting hole, with mulch pulled away from plant stem to avoid insect infestations and rotting.

Watering Azaleas

Spring and summer plantings should be watered 2-3 times per week until fall the year they are planted, then once a week until Christmas. Plants may need to be watered as often as once a day if they are small or the weather is hot. Always check the soil moisture level before watering. It should be lightly moist several inches down, but if it is drying out more frequent watering may be needed. In following years you will need to water your azaleas about once a week unless there is a good soaking rain. Plants will need more water in hot summers and while in flower to keep their growth and form lush.

The Need for Mulch

Mulching around azaleas is always a good idea, and can help them thrive. A 2-4″ layer of mulch should be maintained at all times over the root area of the plant, but pulled away from the stems. This keeps the soil cool and moist, helps control weeds and protects roots in winter.

Pruning Azaleas

Azaleas rarely need to be pruned. When pruning is required it should be done immediately after blooming, since if you wait to prune until summer you may cut off next year’s blooms and miss an entire flowering season. Azaleas may be sheared, as they will send out new shoots anywhere on a branch, or you may choose hand-pruning to create a neater form.

With a bit of considerate care, azaleas can be a showstopper in your landscape. Stop by today for help choosing the best azaleas and learning all you need to know to keep them gorgeous year after year!

azaleas

Nothing Says Welcome Like an Entry Garden

Now is the time to start planning your entry garden. This welcoming patch has the power to set a warm and friendly tone for those who pass through your garden on the way to your front door. It does take some planning to set the proper mood, however, and you need to consider architecture, setting, scale, boundaries and maintenance.

Architecture and Setting

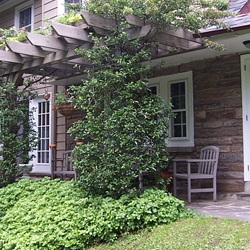
First, it is critical that your garden style suits your architecture and setting to create a cohesive, uniform look. Try to match the hardscaping and plants to the style and feel of your house. A cottage or farmhouse would be accentuated by a friendly, loose informal garden with plants spilling onto the walkway and colors blending together at the edges of beds. A more formal and symmetrical building, however, should be paired with a more structured garden that includes well-groomed shrubbery, stately flowers and a well-defined path.

Plant Scale

Pay attention to the scale of the plants you choose. Plants that will grow too tall or broad can overwhelm the house or crowd the walkway. Plants that are too small can make the house feel too large and unwelcoming. Investigate the mature sizes of plants and be sure they are positioned appropriately within your entry garden so they will not crowd one another or block key features of your home, such as house numbers or security lighting.

Garden Boundaries

Consider setting boundaries for the garden using a fence, wall, hedge or gate. The boundary could encompass just the area around the front door, might include a flowerbed border or could frame the whole yard, but keep in mind the size and style of your home. A white picket fence around the entire yard is a quaint option for a cottage-esque home, but would look out of place with an elegant brick manor, which would be more suited to a wrought iron boundary or classic boxwood hedges.

Maintaining Your Entry Garden

Be realistic about the amount of time you have to maintain your entry garden. If you have limited time, choose native or easy to care for plants that will require little attention. Also consider using containers for some of the plants. They can be easily rearranged throughout the seasons to give a different look to the garden, and plants can be brought in over the winter months. Keep in mind essential tasks such as weeding, pruning and watering, and plan the garden to suit your abilities, time and budget so you can always keep it in perfect condition to welcome visitors.

With a little planning, you can create a welcoming entry garden to beautifully greet guests as they visit your home.

entry_1

entry_2

entry_3

Cool Wave Pansy

Make way for Cool Wave Pansy! New and improved, bigger and brighter, the familiar little monkey-faced pansy is the new garden darling. These flowers are even more versatile and easier than ever, and ideal for so many beautiful landscaping options.

New Pansies

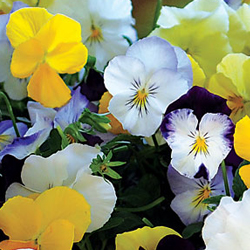
Cool Wave Pansy is a relatively new cultivar that has so much to offer. These flowers are ideal in beds among other plants and shrubs as a colorful vigorous filler, planted en masse as a blooming groundcover or planted to create amazing baskets and container arrangements with 30” of cascading floral beauty. Standing 6-8 inches tall and covered with three times as many blossoms as regular pansies, Cool Wave Pansies have flowers that glow in four new colors.

  • Frost: White with light blue “frost” edging along the petal margins
  • Violet Wing: Front lower petals are white edged with lavender or darker purples, backed with dark burgundy or purple on upper rear petals
  • Yellow: Bright lemony or sunny yellow blooms
  • White: Bright white petals with slight color variations for elegant interest

Growing Tips

Easy to grow, Cool Wave Pansy is much more vigorous than ever. Choose plants with an overall deep green color with plenty of buds for the best results and fastest blooming. Plant in fertile soil where the plant will receive 6 hours of daily sunlight. Use a liquid fertilizer when planting and fertilize every two weeks to maintain vigor and color. Replace with wave petunias in the summer when it becomes too warm for pansies.

Cool Wave Pansy grows well in rain or cold. In fact, it easily overwinters in many areas. This three-season performer may be planted for fall color, overwinter, and then perk up again in early spring providing an early punch of pizzazz. If it becomes too leggy, just cut back the foliage back to 3 inches tall and fertilize. In a couple of weeks, it will be smiling up at you.

When planting in containers, consider the flower and container colors to maximize the visual effect. Interplant with other textures and colors for an eclectic rainbow of vibrance. When planting in fall, add spring blooming bulbs, as they’ll easily grow through the pansies to create a riot of spring color. Spiky grasses provide a tall and contrasting effect to the pansy’s trailing tendrils, especially in larger containers.

With so many stunning options and new colors to embrace, there’s sure to be a Cool Wave Pansy perfect for all your flower planting desires!

pansy_3

pansy_1

Plants for Wet Soil

More water is always good for plants, right? Wrong! When water stands in the soil, air is displaced, which in turn smothers the plant roots. Once the roots are damaged many symptoms appear on leaves and shoots including wilting, marginal and inter-veinal browning of leaves (scorch), poor color and stunted growth. But the excess water isn’t always coming from overwatering, it may be the result of poor draining soil.

Poor drainage is often produced in disturbed sites when heavy clay soil is compacted by construction machinery or other excessive use, such as yards where several children are often playing. Areas cultivated for plantings, such as flowerbed or borders, then collect water running off the compacted ground – this is called the teacup effect. Wet areas may also be the result of swales, drain spout runoff and low areas even when soil percolation is adequate in most of the site but when general moisture levels are routinely high.

To check for a potential drainage problem, dig a hole at least 2 feet deep, fill it with water and note how long the water remains. If it doesn’t drain completely away within 24 hours a severe drainage problem exists.

Fortunately, you can correct drainage problems in different ways. Easy options include…

  • Divert water past plantings using drainage pipes, splash blocks or rain chains.
  • Plant in mounds or raised beds so water will run off and away from the plants.
  • Install drain tiles in saturated areas or use French drains to contain excess water.
  • Amend the soil with organic matter such as compost to improve its structure.

An even easier solution is to simply select plants that tolerate wet sites. The following trees and shrubs tolerate wet sites and flooding better than most. Few tolerate standing water for long periods (those that grow in truly swampy conditions are marked *), but all will do better in wet areas.

Shade Trees

  • *Acer rubrum/Red Maple
  • *Betula nigra/River Birch
  • Liquidambar styraciflua/Sweet Gum
  • Alyssa sylvatica/Sour Gum
  • Platanus occidentalis/Sycamore
  • Quercus phellos/Willow Oak
  • *Salix spp./Willow
  • *Taxodium distichum/Bald Cypress

Flowering Trees

  • Amelanchier Canadensis/Serviceberry
  • Magnolia virginiana/Sweetbay Magnolia

Evergreen Trees

  • Calocedrus decurrens/Incense Cedar
  • Ilex opaca/American Holly
  • Thuja occidentalis/Pyramidal Arborvitae

Deciduous Shrubs

  • *Aronia arbutifolia/Chokeberry
  • Clethra alnifolia/Summersweet
  • *Cornus spp./Twig Dogwoods
  • Enkianthus campanulatus/Enkianthus
  • Ilex verticillata/Winterberry
  • *ltea virginica/Virginia Sweetspire
  • Lindera benzoin/Spicebush
  • Myrica pennsylvanica/Bayberry
  • *Rhododendron viscosum/Swamp Azalea
  • *Salix spp./Pussy Willow
  • Viburnum spp./Viburnums

Evergreen Shrubs

  • *Andromeda polifolia/Bog Rosemary
  • *Chamaecyparis thyoides/White Atlantic Cedar
  • *llex glabra/Inkberry
  • Kalmia atifolia/Mountain Laurel
  • Leucothoe spp./Leucothoe

Perennials

  • *Arundo donax/Giant Reed Grass
  • Aster nova-angliae/Asters
  • Astilbe spp./Astilbe
  • Chelone/Turtlehead
  • Cimicifuga racemose/Snakeroot
  • Helenium autumnale/Helen’s Flower
  • Hibiscus moscheutos/Hardy Hisbiscus
  • *Iris kaempferi/Japanese Iris
  • Iris siberica/Siberian Iris
  • *Lobelia cardinalis/Cardinal Flower
  • Lobelia syphilitca/Blue Lobelia
  • Monarda didyma/Bee Balm
  • Myosotis scorpiodes/Forget-me-nots
  • Tiarella cordifolia/Foam Flower
  • Trollius europaeus/Globe Flowers
  • Viola spp./Violets

Ground Covers

  • Gallium odoratum/Sweet Woodruff
  • Gaultheria procumbers/Wintergreen
  • Hosta spp./Hosta
  • Mentha spp./Mint
  • Parthenocissus quinquifolia/Virginia Creeper

Annuals

  • Cleome hosslerana/Spider Flower
  • Myosotis sylvatica/Forget-me-nots
  • Torenia fournien/Wishbone Flower
  • Viola wittrockiana/Pansies

Not sure which water-loving plants to choose? We’d be happy to help you evaluate your landscape moisture and other conditions to help you choose the very best plants for your yard!

Two feet wearing rain boots standing in the mud

Herbs As Companion Plants

Practiced by organic gardeners for years, companion planting has become very popular for all gardeners. The concept is to plant together species that will benefit each other, to help prevent disease and insect infestation without the use of chemicals. In general, herbs and other aromatic plants like tomatoes, marigolds and onions are helpful in warding off insects. Certain colors, like the orange of nasturtium flowers, are thought to repel flying insects. While these practices have not been scientifically proven, many gardeners have been using them for years with positive results. Try it – and see if it works for you!

Best Companion Herbs

The exact herbs you choose to pair with other plants will depend on what you want to grow and what problems you want to eradicate. The most common herbs and their purported benefits include…

  • Basil – Enhances the growth of tomatoes and peppers. Dislikes rue. Repels flies and mosquitoes.
  • Borage – Companion to tomatoes, squash and strawberries. Deters tomato worm.
  • Chamomile – Companion to cabbages and onions. Improves the growth of all garden plants.
  • Chervil – Companion to radishes.
  • Chives – Companion to carrots. Deters Japanese beetles, blackspot on roses, scab on apples and mildew on cucurbits.
  • Dill – Improves the growth of lettuce, cabbage and onions. Dislikes carrots.
  • Fennel – Most plants dislike it – avoid using it as a companion herb and instead plant it away from the garden.
  • Garlic – Plant near roses and raspberries. Deters Japanese beetles.
  • Horseradish – Plant at the corners of your potato patch; deters potato bug.
  • Hyssop – Companion to cabbage and grapes. Deters flea beetles and cabbage moths. Dislikes radishes.
  • Marigolds – Plant throughout the garden as they discourage nematodes and other insects.
  • Mints (esp. Spearmint and Peppermint) – Companion to cabbages and tomatoes. Deters aphids, flea beetles and many types of cabbage pests.
  • Nasturtium – Companion to radishes, cabbage and cucurbits. Plant under fruit trees. Deters aphids and squash bugs.
  • Onion – Repels cabbage loopers, potato beetles, carrot flies and imported cabbage moths.
  • Oregano – Improves the growth of beans.
  • Parsley – Enhances the growth of roses. Repels asparagus beetles.
  • Pot Marigold – Companion to tomatoes, but plant elsewhere, too. Deters tomato worm, asparagus beetles and other pests.
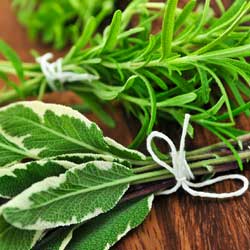
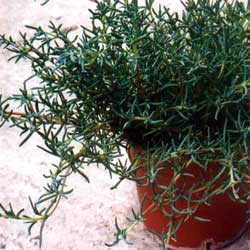
  • Rosemary – Companion to cabbage, bean, carrots and sage. Deters cabbage moth, bean beetles and carrot fly.
  • Rue – Companion to roses and raspberries, dislikes sweet basil. Deters Japanese beetles.
  • Sage – Plant with rosemary, tomatoes, strawberries, cabbage and carrots. Dislikes cucumbers. Deters cabbage moth and carrot fly.
  • Summer Savory – Companion to beans and onions. Deters bean beetles.
  • Tansy – Plant under fruit trees. Companion to roses and raspberries. Deters flying insects, Japanese beetles, striped cucumber beetles, squash bugs and ants.
  • Tarragon (French) – Enhances the growth of all vegetables.
  • Thyme – Improves the growth of tomatoes, potatoes and eggplant. Repels whiteflies and cabbageworms.
  • Wormwood – Use as a border, keeps animals from the garden.
  • Yarrow – Plant along borders, paths and near aromatic herbs. Enhances production of essential oils. Attracts beneficial insects including ladybugs and predatory wasps.

Exactly how much benefit companion plants give to one another will vary; be sure to choose varieties to group that have similar soil, light, water and fertilization needs. Even if their companion benefits may not pan out, you’re sure to enjoy a more diverse and vibrant garden filled with delicious vegetables and herbs!

herbs_companion_3

herbs_companion_1

herbs_companion_2

Scented Geraniums

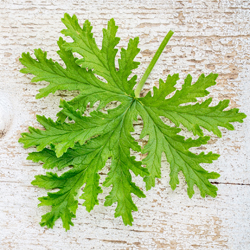
Unmatched for fragrance and beauty in the garden, scented geraniums are undoubtedly showstoppers. With many to choose from, each with its own distinctive habit and fragrance, scented geraniums are also great for hanging baskets, window boxes or any type of container. Although the colorful flowers are small, the leaves of the scented geranium are the most spectacular part of this unusual herb.

A Bouquet of Scents

Scented geraniums come in a wide range of distinctive aromas. Some of the most popular varieties include…

  • Rose Geranium: This cultivar has spicy rose-scented foliage with small clusters of pink flowers among the dark green leaves.
  • Peppermint Geranium: This is a fast growing geranium that spreads to a 4-6 foot mound with clusters of white flowers appearing in summer. Leaves are lobed and medium green. This is a particularly good one for hanging baskets.
  • Lime Geranium: This geranium shows off beautiful lavender flowers in summer and its leaves are serrated, round and light green. These can become quite bushy.
  • Apple Geranium: Apple-scented geranium is another good one for a hanging basket. Clusters of white flowers appear on trailing stems and leaves are round and ruffled.
  • Lemon Geranium: This geranium has tiny purplish flowers and small wrinkled leaves. This one features a nice clean lemon scent that freshens a room quickly.
  • Coconut Geranium: This plant has a trailing habit that works nicely as a ground cover or in a hanging basket. Its flowers are in small clusters and its leaves are round and dark green.

Other popular scented geraniums include chocolate, nutmeg, orange, apricot and almond.

Growing Tips

Scented geraniums are not particular about soil, as long as it is drained – they do not tolerate wet roots well. These plants enjoy full sun and cool climates, with partial shade in warm areas. Pinching off end leaves will encourage bushiness to help keep a fuller, more compact form.

The leaves can be harvested any time and used fresh or dried.

Harvesting and Use

One of the real joys of scented geraniums is harvesting the leaves and using their fragrance in a variety of ways. The leaves can be harvested at any time, and they may be used fresh or dried, though the fragrance may change somewhat or its potency may change as it is dried. Experiment with both fresh and dried leaves to find the aromas you like best.

Scented geraniums can be used in some jellies, puddings, stuffing, punches, teas and vinegars. The oils in leaves are often distilled to make perfume, and the leaves make a sweet addition to sachets and potpourris. No matter how you use them, or even if you simply enjoy them in the garden, these lovely plants are sure to be a welcome addition to your garden and landscaping.

citronella leaf on grunge wood

Create Successful Shrubs With Proper Pruning

Gorgeous yellow, pink, red, orange, white and purple blooms put on a show in early spring from plants like forsythia, lilac, azaleas, rhododendron, mockorange, weigela and bridal wreath spirea. Summer then greets us with bold blossoms in hues of purple, magenta, blue and red from butterfly bush, hydrangea, crape myrtle and rose-of-sharon. These deciduous shrubs provide a beautiful backdrop for the garden and most of these plants only require basic watering, fertilizing and pruning. Why not add them to your yard today?

More Blooms, Better Blooms

To keep your shrubs healthy and blooming prolifically, it is important to know which plants to prune at what times. Before you go chopping away, do a little research about when your shrub should be pruned. If you don’t do it at the right time, you won’t get many (or any) of those gorgeous flowers to enjoy.

Shrubs to Prune When Dormant

Shrubs that produce flowers on wood grown in the same season should be pruned in late winter or very early spring. This allows time for the wood to grow and the current year’s buds to set to produce more beautiful blooms the next year.

  • Abelia
  • Beautyberry (Callicarpa)
  • Bluebeard (Caryopteris)
  • Butterfly Bush (Buddleia – except Alternifolia)
  • Cinquefoil (Potentilla)
  • Crape Myrtle (Lagerstroemia)
  • Hydrangea (Paniculata and Arborescens)
  • Rose
  • Rose of Sharon (Hibiscus)
  • Spirea (all species that bloom in summer)

Shrubs to Prune Immediately After Flowering

Shrubs that bloom on year-old wood and need to be pruned just after blooms fade. This allows enough time for the new branches to form next year’s buds.

  • Azalea
  • Barberry (Berberis)
  • Beautybush (Kolkwitzia)
  • Heather (Calluna)
  • Daphne
  • Deutzia
  • Forsythia
  • Honeysuckle (Lonicera)
  • Hydrangea (Macrophylla, Seratta and Quercifolia)
  • Kerria
  • Lilac (Syringa)
  • Mock Orange (Philadelphus)
  • Pieris
  • Rhododendron
  • Scotch Broom (Cytisus)
  • Spirea (spring blooming varieties like bridal wreath)
  • Weigela
  • Witch Hazel (Hamamelis)

Still Not Getting Any or Many Blooms?

Even with proper pruning, it is possible you may not be seeing the blooms you’d hoped for. Some routine maintenance will help keep your plants healthy so they can produce those fantastic flowers.

If you haven’t already done so, fertilize plants this spring with Plant-Tone, Holly-Tone or similar products (for those acid-loving azaleas and rhododendron). Move the mulch and sprinkle the food lightly over the soil at the outer edges of the plant, then water well. Replace the layer of mulch to help conserve moisture and prevent most weed growth.

Though an established shrub can endure a moderate drought, it will flower more reliably if you help it through the dry weather with a weekly watering. Consider a drip system to provide good water and minimize evaporation.

Other reasons your shrub may not be putting on its best flower show might include improper lighting or incorrect soil conditions. Similarly, if a plant does not receive enough sunlight or if the soil pH isn’t suitable for that type of plant, it will not flower as it should.

If you’re having trouble with a particular plant, stop by or call us to help you find out why. And, remember, sometimes it just takes patience. Some plants, like wisteria, can take up to seven years to produce flowers, but will be well worth the wait for the amazing show they produce.

shrub-prune-2

shrub-prune-1